Friday 18 November 2016

Just Quilting a Quilt


I have a friend named Mo who gave me a bag of UFOs. (For non-quilters, UFOs are UnFinished Objects.) Included in that bag was a selection of little bags inside a slightly larger bag. Imagine my delight when I discovered a Block of the Month - with all the parts! One copy of the instructions, one copy of the final layout, and written on the back of the final quilt layout, the fabric requirements for the two borders.

The only problem with the Block of the Month was that all the blocks were the same. They were all HSTs (Half Square Triangles) I think Mo must have found them boring - she had put together one month's worth of units - 16 of them. And had cut out another package's worth, and then I think her enthusiasm must have waned.

The directions suggested cutting out the squares, measured to the 7/8s of an inch. (I NEVER do this. I have a pretty accurate 1/4 inch seam, but I just can not seem to get HSTs to come out exactly right unless I paper piece them...) And then the squares were to be cut in half, and those triangles were to be sewn together - on that stretchy bias. 4 of Mo's already sewn together squares did not measure 4 1/2 inches. And when I sewed some of the already cut triangles together, they did not make 4 1/2 inch squares either. So I did what I always do with HSTs - I cut the rest of them 1/8 of an inch LARGER and drew the diagonal line, rather than cutting them. Then I sewed two seams on either side of that line. I cut the two HSTs apart, pressed them open and trimmed them. Takes time but I end up with accurate units.

I think there are 196 HSTs in it. I could see not being excited by the second or third package of fabric. However, doing it in a short time, it was quite pleasant. (And you couldn't put it together as you went along, because the units were supposed to be mixed sort of randomly around the quilt.) Anyway. I had the two border fabrics in my stash, and I got backing and batting and put the whole thing on the frame.
Mo's Block of the Month
And then I thought about it for a week or so. I want to finish this quilt for a man who lives at my Dad's senior residence. And he likes the seaside, so I decided to go with that theme. (Yes, even though the border fabric that I used has snowflakes on it...)

So I doodled first.
Water-y type things

Sailboats from a Craftsy class

Sand dollars, starfish, clam shells, lobster claws, periwinkles and pebbles
Once I had some thoughts in my head, I put the needle down where I wanted to start in the border, pulled it up, took three stitches in the same spot, and then off I went. Sailboats first.
Free motion sailboat, on snowflake fabric (yes, I know...)
I did a row of sailboats and waves underneath and didn't take any photos of them... Don't know what I was thinking. In the corner top and bottom, I free motion quilted a sun - also no photo... I'll get one tomorrow... And it wasn't very long before I ran out of bobbin thread! I use cotton thread when I quilt and I use ALOT of it as I tend to quilt quite densely. I clean a fair amount of fluff out of the inside of the sewing machine each time I change the bobbin.

My two paint brushes that I use to de-fluff Big Martha

The bobbin case


De-fluffing the bobbin case
Where it belongs! Make sure it clicks when you put it back!

I try to clean in here very very thoroughly each time I replace the bobbin

Fluff
The bobbin was taken out, de-fluffed and refilled. The inside of the machine was dusted out and de-fluffed as much as possible. The bobbin was replaced, everything was put back together, and I got ready to quilt some more.

I decided that I would quilt the sailboats on the two long sides of the quilt, with a sun in each corner. Along the top and bottom of the quilt, on that border I would quilt the pebbly pattern with the shells and so forth in it. And on the lighter diagonals I would quilt the pebbly pattern too...

What I discovered was that my thread, which showed very well (perhaps too well) on the borders, doesn't show up at all against some of the beiges in the lighter diagonals. So. I have this great LED flashlight. I hold that in my left hand, low so that I can see what I am quilting and I move the machine with my right hand. This works fairly well. (I will leave the dark diagonals unquilted, so they will be puffier, if that is the right word)
Pebbles and sand dollars and shells
I worked until I ran out of bobbin thread for the third time. That seemed to be sufficient for today.
More pebbles and a clam shell.
A star fish, some swirls and more pebbles
Pebbles and a sand dollar, and oops, no more bobbin thread
I hope to get more done tomorrow, and will try to get photos of the things I have missed this time!


Sunday 13 November 2016

Just Loading the Quilt on the frame


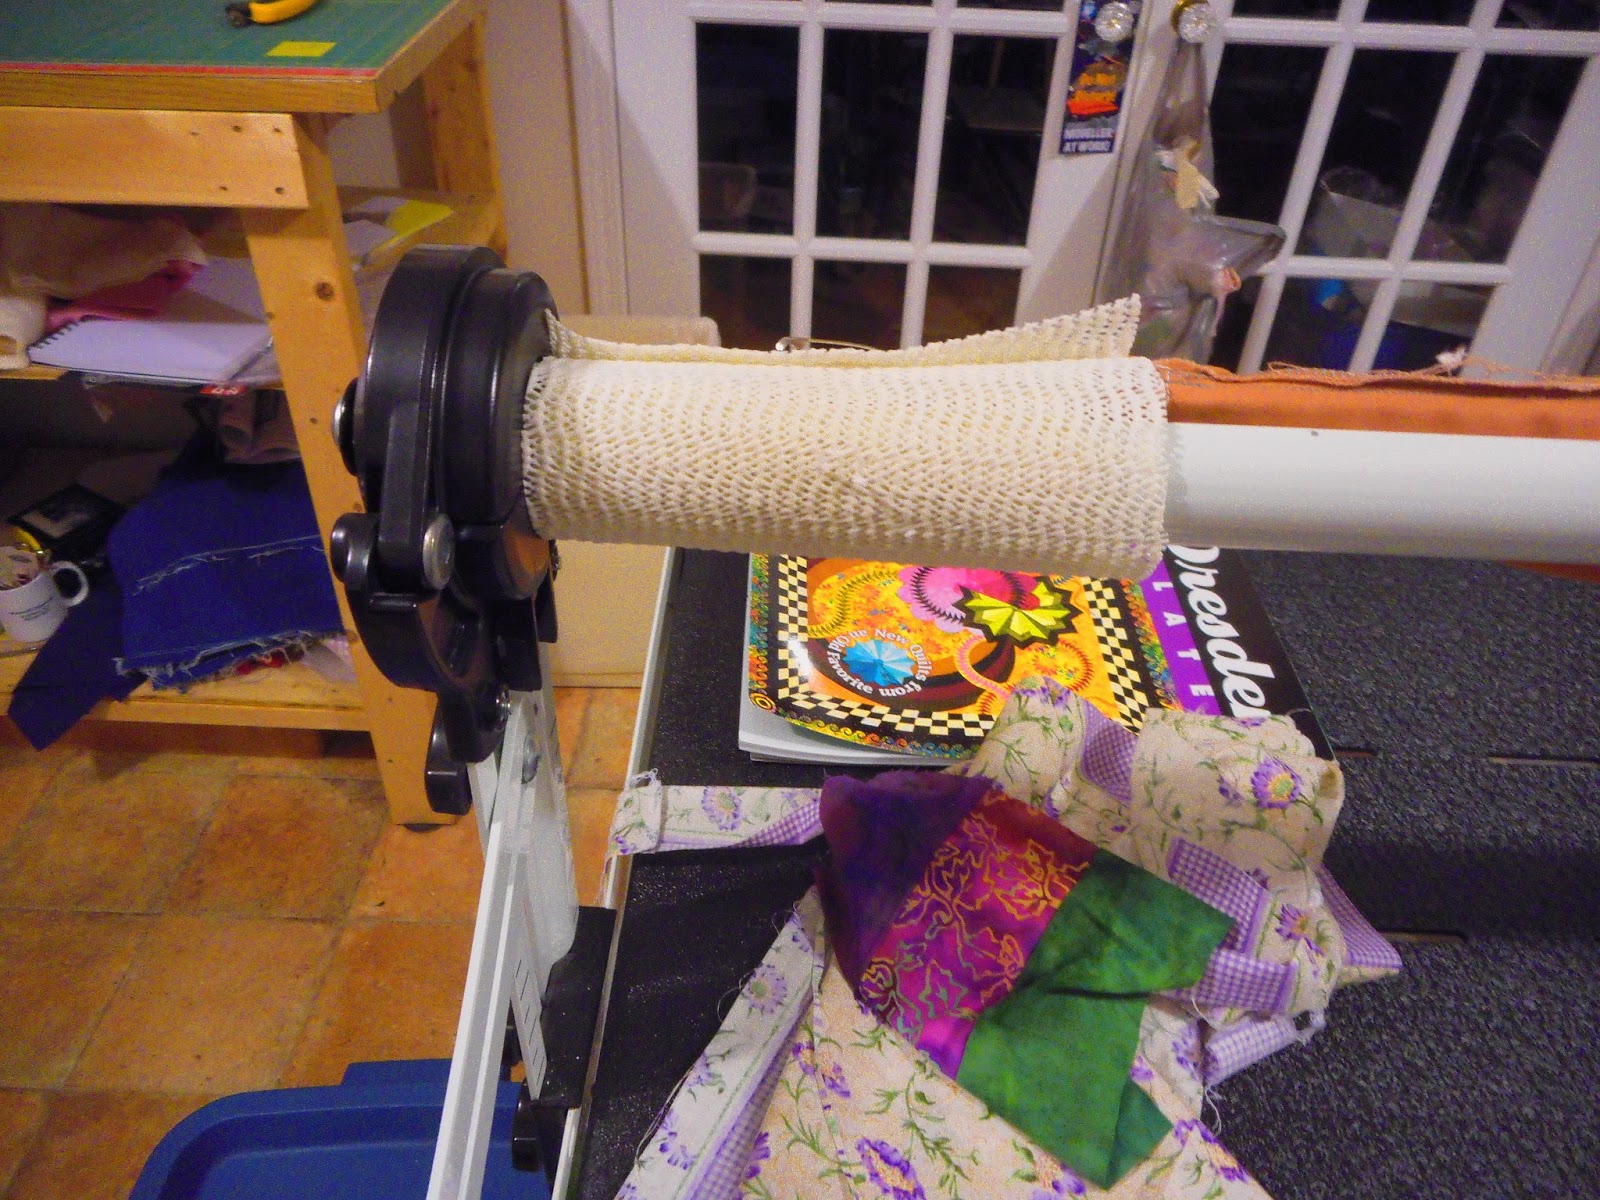
When I first got the frame and Big Martha (the Janome 1600P mid arm sewing machine) I needed to have or make leaders. The manual that came with the frame described how long and wide they needed to be, and I had picked up a large quantity of heavy weight fabric that someone had left on the donation table at my quilt guild. I had more than enough fabric to make them.
Leaders on my Grace Frame
I followed the directions and made three of them. One for the Take Up Bar, one for the bar along the front, and one for the bar that is about knee height, behind this long leader that you can see hanging down along the front.

Commercially produced leaders have lots of bells and whistles. I have seen some with zippers at Atlantic Fabrics - so that you can take a quilt OFF of the frame without unpinning it, replace it with another quilt, finish that one and then put the first one back on.

I have also seen commercially produced ones with a grid marked on them. This would be handy when you are new at this, I think - but my leaders were free and that price was right! AND I wanted to quilt something on there right away - waiting for something ordered to come in would have been unbearable.
The frame showing all four bars

I need to share a couple of other things about leaders. When I first started this, I had three leaders. My frame has four bars. The furthest one to the back is for the batting. I have never bought batting on a big roll, which is what this would be used for. I have always bought batting cut to the size, more or less, of the item I am quilting. So, the very first quilt I did (after the panel I used to try this out), I rolled the batting on that bar, and several of my facebook friends who were experienced long armers advised me to just leave the batting loose, because this can stretch it, or even tear it. I have two things to say about this. Be careful that you don't end up with a fold from batting that was packaged folded, INSIDE your quilt. So be careful to smooth things out, as you go along. AND don't catch your foot in the loose end of your batting - as that will tear it for sure! (Fortunately, when I did this, I put my foot and sneaker through a piece I was intending to cut off, but I would have been an unhappy camper if it had been the OTHER end of the batting that I tore.)

The top bar, inside the throat of the sewing machine is to Roll Up or Take Up the quilt that you have finished.

The top bar along the front is what the backing of your quilt is pinned to and then rolled around, to hold it taut and straight while you work on your quilting. When you are finished the piece of quilt that your sewing machine can reach, and you are ready to work on the next bit, you roll this bar forward, and then roll the Take Up Bar back, so that your quilt advances and you can reach the next part with the sewing machine needle.

The bottom front bar is for the quilt top to be attached to. The YouTube video that I watched, showed this in use. The leader for this bar was the widest. After I had quilted several quilts, some of my quilting friends suggested that I try 'floating' my quilt top. That is, they suggested that I just let it hang down in front of the frame. Gravity pretty much holds it in place, and the spots that are touching the batting are usually held quite still by friction...

I tried this, and it worked slick and saved a lot of work pinning and unpinning of the quilt top. I took the widest leader off of that bar and moved it to the top bar on the front (where the backing is attached) and this has let me quilt long skinny things that I couldn't reach with the narrower leader that used to be on that bar.

Pinning the sandwich onto the leaders:

Some things to know about using a frame versus quilting on your domestic machine

Here is one of the big advantages of using the frame as opposed to quilting this on your domestic machine. NO BASTING! No sewn basting, no pinned basting and no sprayed basting. No basting!

Before I put anything on the frame though, I do check to make sure that my backing is bigger by at least 2 inches all the way around than the quilt top - and three inches on each side is BETTER than just two inches... I also make sure that my batting is big enough... bigger than the top, and about the size of the backing. Occasionally, I put wider batting on there and trim it as I roll the quilt... Everything is straight and still when you do this, and trimming batting is tricky when it is on a table or the floor, unless the quilt is quite small.

Also before I put anything on the frame, I think about what I am going to quilt on it. I just did a quilt that I wanted to put words on. It also had a cat in the middle. I'm good at being able to quilt things in every direction, BUT I wanted the words to look pretty good - and I was afraid that if I tried to do them sideways that would be really difficult - so I loaded that quilt with the 'picture' of the cat, right side up.
Quilting Cats Quilt top, loaded on the frame right side up
So, having decided which way up I want the quilt (and this one wasn't too difficult, the quilt top was square!) I put the backing on the frame first.

Before I get to the "how" of that, I just thought of two other things. When I first loaded a quilt top on the frame, I watched a YouTube video on how to do it. And the lady carefully stressed how important it was that the quilt be centred on the frame.

For about three years I carefully centred my backing on the frame, sometimes making it hard to get at the sewing machine's bobbin which needs to be changed frequently when you do as much dense quilting as I do. This meant I needed to mark the middle of the backing, I needed to know where the middle of the leader was, and I needed to match up the middle of the quilt top to that. It was a pain in the neck.
Big Martha on her tray, as close to the far end of the frame as she can reach!


So one day, I loaded a quilt as close to the far end of the frame as I could. The point of loading it in the centre, according to the lady whose video I had watched, was so that everything would be straight... Well, I found out another, much more important reason with this quilt. Because your sewing machine sits in the middle of the tray that holds the machine and allows you to move it around, and because the needle on your sewing machine is in the middle of the front of the sewing machine, and because the tray can not extend OUT PAST the edges of the frame, you can not quilt a quilt that is too close to the edges. ACK!! So I had about three and a half inches of quilt that I could not reach...
Take Up Bar Leader, with reminder note!
To solve this, without having to take the quilt off of the frame and repin it (I had already started the first pass, and I couldn't figure out how I could do that easily!), I went to the other end of the leader, pulled the plastic tube out of the track and I cut a piece off of my leader (without cutting the plastic tube!) Then I did the same thing to the longer one on the front roller. Then I could slide the whole quilt towards the other end by about three inches and I was fine. (Man!)

Okay. I may think of other things on that vein later, but for now, here's how I loaded the quilt backing onto the frame.

FIRST, make sure that the WRONG side of the backing is UP! Otherwise, when you have finished quilting your quilt and you take it off of the frame you will either be in for a lot of UN-Quilting - and if you think reverse sewing is unpleasant, it is NOTHING to reverse quilting -  or you will be living with the wrong side of your fabric showing on the back of the quilt. Ask me how I know this. (I have actually taken ALL of the quilting out of two quilts. The first one because the backing shifted on me between the time I spray basted it and the time that I got to the actual quilting on my domestic machine... I ended up with about a 6 inch pouch on the back of the quilt - I couldn't quilt that out... LOL The second one was because my quilting skills had progressed and I had spent too much time and effort on the top to leave the original quilting in there... That one took me years to get completely unquilted, but it looks great now!)

Okay, so you have your backing oriented with the wrong side up. Usually, I put the long edge of the backing and the long edge of the quilt top (eventually) along the Take Up Bar - but not always. The cat quilt is an instance where I wanted to quilt something directional onto the quilt. But sometimes you have no choice. I quilted an oversized king size quilt on my frame. I could not have put it with the long sides of the quilt along the Take Up Bar because the quilt was about 15 inches longer than my frame was wide!

If your backing has selvage edges on it, you can pin the selvage edges to the leaders, if it will fit that way, and if that leaves the quilt top in the orientation that you need it. The advantage of that is twofold! :-) (Two advantages!!) The selvage edge is straight! Which is handy! AND it won't fray!

So first you pin, carefully and straight, your quilt backing to the leader along the Take Up Bar. (I drape the rest of the backing over the top bar on the front of the frame. This holds some of the weight up, and it is going to go there eventually anyway!)

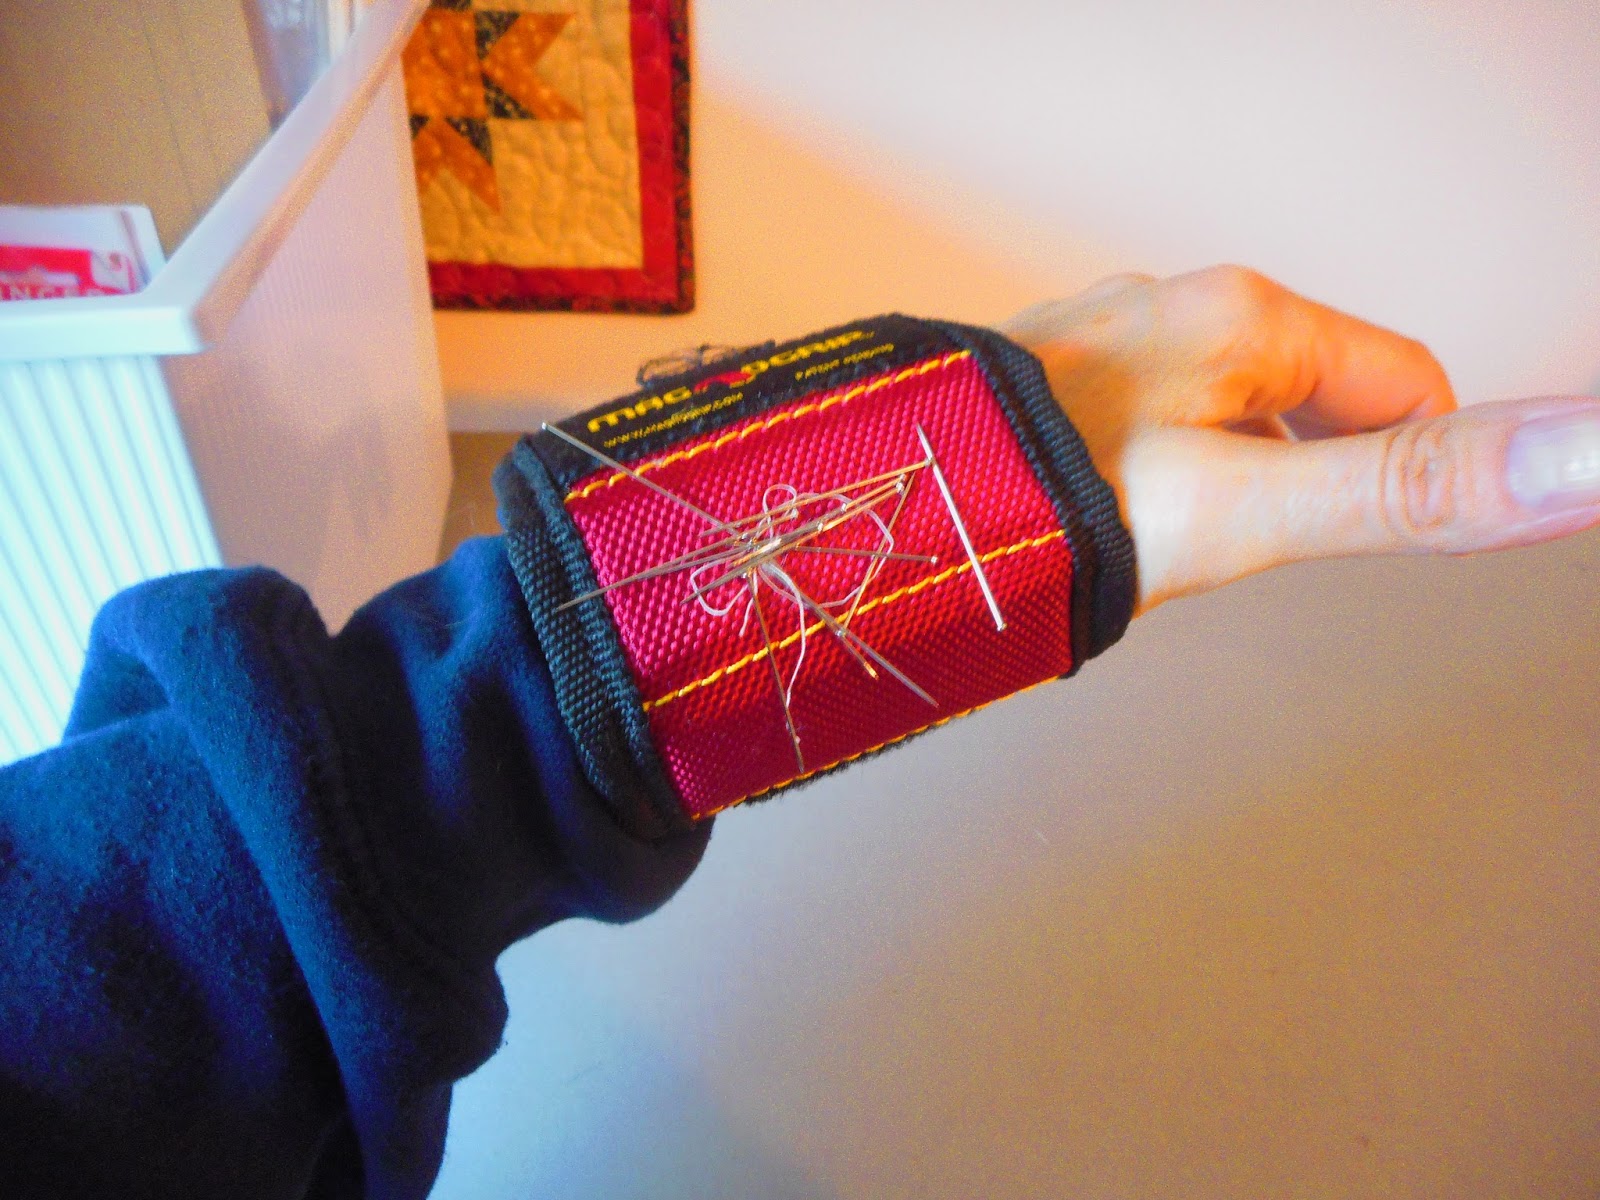
I have a magnetic dish - a mechanic's dish, that I bought at Canadian Tire, and a selection of straight pins with no plastic/glass heads. (I also have a carpenter's magnetic armband that I got at Lee Valley, and it is wonderful too.)
Magnetic dish with straight pins
 This is my favourite thing to use when pinning a backing to the Take Up Bar.
Carpenters Magnetic Wrist Band
The Magnetic Wrist Band is also wonderful but I am used to the mechanic's dish now.
Magnetic Dish balanced on the Take Up Bar

When I put the backing on the frame now, I start on the right hand side and work toward the left side.

Backing, wrong side up, being pinned to the Take Up Bar leader

I am right handed and this works for me. I believe the directions I had originally had me working from the centre of the backing to the right and then from the centre to the left, but I found it difficult to do that, I had to pin half the quilt left-handed - and as long as everything stays straight, and the sewing machine can reach all the parts of the quilt to quilt it, what difference does it make. So if I was left handed, I would start at the left hand side of the quilt and pin towards the right hand side...

Backing hanging over the front top bar

Once that edge of the backing is pinned to the Take Up Bar's leader, I then roll the Take Up Bar a bit to keep the backing straight and so that I can conveniently get at the other edge of it, which I pin, in much the same fashion to the leader on the front top Bar. To do this, I have the Bar turned so that the leader is over the bar and hangs down a few inches, somewhere between 8 inches and 12 inches (20 cm to 30 cm). I want the leader to be straight and smooth, at this point, because I want the backing to hang straight and be pinned on straight as well.
The front top bar has been turned enough to match the backing with the bottom edge of the leader

I roll the Top Front Bar so that the backing is hanging down at about the same level as the edge of the leader. Then I kneel or sit in front of the frame and pin the two pieces together. I used to worry about which way the fabrics met - would something have to fold when it was rolled up... But I have discovered that that doesn't matter as long as it is consistent and smooth.
Backing rolled up, all ready for the batting


When I have the backing on both leaders, I unroll the Take Up Bar and roll up the Top front Bar, until the backing is all rolled up on the front bar, smoothing it as I go so that it stays straight and smooth. And so that the Take Up Bar Leader is exposed. (The quilt will roll UNDER the Take Up Bar, and OVER the top front bar.)

Then I take the batting and I lay it, oriented correctly so that it will fit slightly larger than the Quilt Top both to the front and back edges AND to the right and left edges. I smooth this out without stretching it, and drape the edge out of the way of my feet, behind the bottom Bar. I don't pin this at this point!
The quilt top, on top of the batting, on top of the backing

Then, I put the quilt top on the frame. I put it on so that I will NOT accidentally quilt through it and through the leader at the Take Up Bar. It is also forward far enough that I can see the batting between the pins holding the backing onto the leader, and the top edge of the quilt top. I make sure that it is straight, and smooth and that I have it oriented the same way as the backing and batting...
Top edge pinned carefully through batting and backing

Once it is on there, I carefully pin through the top, backing and batting, parallel to the leader. Again, I am careful that I will not be quilting through the leader and that I can see batting beyond these pins. (I am also mindful of how much extra length I have in batting and backing than I have in the quilt top. If they are both 6 inches longer than the quilt top, I know I have lots of leeway. If there is only 2 inches, I want to be careful! I would not like to get to the other end of the quilt and discover that I had run out of back (or batting) before I ran out of quilt top!
Three pins to hold side of quilt straight

I make sure everything is smooth, and I put three pins on each side, to hold the top and batting onto the backing. I put these pins about 6 inches apart and parallel to the leader.

I adjust the length of the clips and clip them onto JUST the backing. Don't make them too tight - you will stretch your backing and don't clip them to your batting it will stretch very easily and could tear.

My friend who has a long arm, runs a long row of stitching along the top of her quilt to hold everything together. I can't seem to do this without having things shift around - and I don't want to make puckers in my borders or edges. If you can do this, will you tell me how you do it? (Maybe I am doing something wrong!) When I begin to quilt, I remove those pins as I go along. If you run over them you might break the needle - ACK! And you could even pop the inside of your hopping foot out. (Mine is long gone - ran over the bead on the head of a pin and popped it off. The sewing machine needle ran over it, and that was the end of that!)

Here is a hint that I found helped me when I first started free motion quilting with my Mid Arm on the frame. It is easy to see that whole wide space and to forget where the Take Up Bar is in relation to the inside of the throat of your machine. You can only quilt, without rolling the quilt forward and backward, a strip about 6 inches deep that is the width of your quilt. If you try to pull your machine towards you more than that, the Take Up Bar will BOUNCE off of the inside of the throat of your machine and leave a jagged bumpy bit of quilting, which you probably won't like much. (I sure don't!)

So here is my suggestion. I have several long pieces of selvage edge that I have cut off of (usually) backing. Before I start quilting, I pull Big Martha as far forward as she will reach, and I lay that piece of selvage edge the whole width of the quilt, just outside the area that Big Martha can reach. (That way I don't accidentally sew the selvage edge onto the quilt!) If it is inclined to move around, I pin it down with a couple of clothespins - one on the right and one on the left edge of the quilt. THEN when I am quilting, I am conscious of how far forward I can reach with the sewing machine needle. As I advance the quilt, I also advance the selvage edge. As you roll more of your quilt up onto the Take Up Bar, this strip gets narrower and narrower, so you will have to move your selvage edge forward a bit more each time...

As I move along the edges of the quilt, where those three pins are about 6 inches apart and parallel to the leaders, I remove the pins before I quilt the spot where they are pinned and I move them to hold the next bit of quilt flat. BE CAREFUL not to cut yourself on them smoothing things out... And if you do, try not to bleed on your quilt. We suffer for our art, right?

Well, I think this is enough information on loading the quilt onto the frame - and how I have streamlined that process over the past 5 years. I hope it helps you.

If you have any helpful hints, I would love to hear them and try them out!!!

Oh, by the way, here is a photo of the Quilting Cats quilt... Can you read the words? I was really pleased with how it came out.


Thanks!
Just Jane


Saturday 12 November 2016

Just Quilting with a Janome 1600P on a Grace Frame

I have a Janome 1600P named Big Martha set up on a Grace Frame. The frame is 120 inches - 10 feet - long - and the way the sewing machine is set on it, I have about 7 inches of that width that my needle can not reach.

Grace Frame and Big Martha (Janome 1600P)
This photo is taken from the back and one end of the frame. I wanted to point out the holes in the legs of the frame. You want your frame to be set for YOUR height. When you are standing in front of the frame holding the handles that allow you to guide the sewing machine, you want your elbows bent at about a 90° angle. If it is too low or too high you will hurt your back, shoulders, arms and neck!

I stand on the other side. The reason I took this photo is so that you can see the tray that the sewing machine sits on. The machine is fastened down, so it can not slide off of that tray (or shift around on it) but the tray itself has a cleverly designed set of wheels so that it can move the length of the table, and forward and backward, enabling me to pull and push it around easily and quickly from the hand holds on the front.
Ribbon 

Here you can see the comfortable handholds for the machine, as well as the throttle which is connected by a wire to the back of the machine (where the pedal would plug in if I were using it on a table.) The throttle is connected with velcro to the handle of the tray. I have a piece of red ribbon tied to hold that wire up. When a full sized quilt is on the frame, and I am getting close to the end of the quilting process, that wire sometimes get hung up on the rolled up quilt. I found that inconvenient - this was an easy solution.
Throttle
The throttle itself has a button at the top that says, "Pulse" beside it. When you hold that button, the machine runs. When you let go, the machine stops. This has the advantage of making the machine stop easily when you need it to. (More on this in a second.)

The button below that is an ON/OFF button. You push once to turn it on and once again to turn it off. This is not spectacularly convenient... Say you have come to the end of a pass  and you need to stop - you have to take your eyes off of the quilt, (and you need to keep moving the machine - if you quilt too many stitches in one spot you will break your thread AND build up a pile of thread that you likely don't want on your quilt!), find the button and push it. If you keep your thumb on it, you might stop the machine when you don't want to - and if you keep moving things you will break the needle and you could tear your quilt. (I have never done this, so I am not speaking from experience...)

The little knob controls the speed of the machine. But you can't turn it up and down easily while you are using it. Unlike the foot pedal, there is no control of the speed of the machine by the throttle - you are going as fast as you have the machine set when it is on and you are not going at all when it is off. This is fairly easy to get used to.

Here's the more on those little buttons though. When you are quilting for hours, those little buttons try to make a hole in your thumb. So I took a penny and some duct tape and made a cover for the top button - the pulse one.
A penny and duct tape to save my thumb

Now when I hold that button down I push on the penny and my thumb is fine.

There is also an option for a thread cutter on this throttle control (which came, I believe, with the frame.) The sewing machine has the button but I rarely use it and I do not have the connection that goes between this control and the sewing machine.
Space between bar, throat and needle
This photo is taken from the side - you can see the bar that the backing, batting and quilt top roll up around as you work. This bar is adjustable, up and down. As more of the quilt is done, the roll that is on that bar gets bigger and bigger. You need to lift the bar, otherwise the roll of finished quilt will eventually make it impossible to move the machine... it will be 'holding it down' as it were. (There are easy adjustments on either end of the frame for moving the bar up and down.)

And here is the major difference between a midarm (without a computer or a stitch regulator) and a long arm machine with neither of those. See where the bar is in relation to the inside of my machine's throat? Or harp, if you prefer? See where the needle is? When the machine is touching that bar, that is as far forward as I can quilt. This means, at the beginning of a quilt, I have about 6-ish inches of forwards and backwards motion that I can make with the mid arm. The whole width of the quilt - but only forwards and backwards about 6 inches. If I forget and pull the machine forward, it will BOUNCE off of that bar, and make a jagged bump in my quilting.

Another picture might help.
Three passes to get this quilted
So. In order to quilt the plum coloured setting triangles, and then the striped diamonds, this took me three passes. As it happens these pieces were small enough to fit within that 6 inch-ish space early on in this quilt. So I quilted the plum triangles from the left end to the right. Then I quilted the top half of the striped diamonds.  This pattern sort of starts on the left and goes to the right, so when I got to the right side of the quilt top, I stopped, cut my threads and went back to the left. I rolled the quilt far enough forward that I could go from the middle line down to the bottom of the diamond, without bouncing the needle end of the sewing machine off of the rolled up quilt at the straight line, or bouncing the harp of the machine off of the other side of the roll up bar, when I got down to the point.

By the end of the quilt, I had to roll the quilt back and forth slightly for each diamond to reach the point AND the straight part.


Hand wheel (now long broken)
The frame itself came with a little wheel to roll the quilt forward and backward. I'm sorry to say that some of the parts of the gearing for this little wheel are plastic. I broke it in three places.
Non-skid shelf liner for advancing the quilt

I now have a loop of non-skid shelf liner on the top bar and the front bar of the frame at this end so that I can advance the quilt without hurting my wrists. It is amazing what a difference this makes when loading the quilt onto the frame, as well. MUCH easier!

I have gleaned some hints about setting up the Janome 1600P, as well. If you are having trouble with your thread breaking (or skipped stitches), I suggest you try these.

This piece of advice is my own. I have discovered that my machine builds up a little wad of dust/fluff (mostly from thread) between the bobbin case and the feed dogs (which are covered with a plate, as opposed to lowered or raised on my machine.) This wad gets bigger and bigger and denser and denser until it either somehow compresses itself through a tiny hole and attaches itself to the back of a quilt (where I find it and cut it off later) OR until it just makes the thread break over and over. I find the easiest way to get this out is to unplug everything, take the machine off of the frame, lay it on its side, take the bottom off of it, and turn the hand crank. Armed with a small paint brush, a pair of tweezers and a large vocabulary of swear words, the wad usually just falls out in this attitude. When the machine is upright, it must be caught in there somewhere. When I have the machine apart, I dust the whole case out, taking care NOT to disturb anything that the manufacturer has covered with lubricant, and looking for stray pieces of thread around the shaft that turns the bobbin case at the same time. To prevent this (as much as possible or delay having to do this more often), see Changing the bobbin below.

• Take Up Roller (bar) rolled in the wrong direction (The quilt needs to go under the bottom and up the back of the bar - not over the bar from the front. If you are standing at the left hand end of your frame looking at the length of the frame, the quilt needs to be rolling up clockwise as you work on it.)

• Thread, could be old, poor quality etc., try a different brand/spool (I have had people tell me that they spray there thread with something, even water, and this helps. I have not tried this and would rather use good quality thread anyway - far fewer problems all around!)

• Thread wrapped around the bobbin case latch or behind the bobbin case (If it is behind the bobbin case, UNPLUG the machine and take the machine off of the frame (perhaps with help, it is fairly heavy), lay it on its side on a sturdy table, take the four screws out of the bottom of it and remove the bottom. You may be able to see the thread that way. You can turn the hand crank to move things around. DON'T put your fingers anywhere near the needle. In fact, why not remove the needle before you do this!) (To reset your hand crank, push the needle up/down button twice, when you have everything right side up and plugged in again, with the machine unthreaded.)

• Thread delivery, thread catching as it comes off the spool, either on the spool end itself, the spool cap etc.

• Thread has wrapped around the 3 hole thread guide on the sewing machine. (I look for this immediately when I have problems with the thread, and I check it when I thread the needle or change the bobbin.)

• Needle/thread, size/weight combination incompatible

• Needle inserted incorrectly, not fully up in the shaft or turned the wrong direction

• Machine threaded incorrectly (Look at your user's manual!) (I quilted a few quilts with the bobbin in the bobbin case backwards... it took an effort to learn how to thread it properly again. I can't believe it worked at all, and I can't figure out why it stopped working...)

• Quilt sandwich too tight (I have never had this one happen!)

• Burr on needle, needle plate, hook or other location on the machine (Feel for this with your finger. Replace the needle if you have a bur there. The needle plate can be lightly sanded with an emery board)

• Inconsistent or erratic movement of machine (Check the wire connecting your throttle to the machine, both at the throttle and at the machine. Check to make sure you aren't in the process of coming unplugged both at the back of the machine AND at the wall... Ask me how I know to check these.)

• Be sure that the presser foot is up when threading and down when sewing (If you thread your machine with the presser foot up, then the thread does not go IN BETWEEN the tension plates. If you change your tension, you need to lift and drop the pressor foot as well. My machine will NOT SEW if the presser foot is up - which is nice... my little machine would - what a mess on the back.)
Speed control on Big Martha, Turtle, Sleeping Bunny & OMG Leaping Rabbit

• Speed on the machine itself, set too high, it should be in the middle (In fact, when you are new at this, set the speed on turtle - not on the "OMG! Leaping Rabbit" setting!)
 Side clamp

• The quilt sandwich needs to be level, only the backing is secured with the side clamps. After the quilt on the take up roller (bar) gets larger you will need to adjust the level from time to time. (I had no idea that only the backing should be secured with the side clamps - what a difference that makes!) (The picture above shows the side clamps. This is the only major thing about the frame I would change - the handle parts stick up above the quilt and they get caught, occasionally, on the handles when I am working on the edges of the quilt. They are hard to do without, and I haven't figured out what I could use instead that doesn't stick up so far but which could hang on like these do.) (They are AMAZING at holding onto the quilt!)

Thread holder, air intake for motor, hand wheel, barely visible!

• Lower the thread stand to approximately 1” above the spool (I raise it when I fill bobbins with a second spool, well, cone, so that the threads do not get tangled up. I take the second cone OFF of the machine and store it with my bobbin changing stuff (more on that later!) when I am not using it. That thread can get tangled on the hand crank or pulled into the motor of the machine through the intake on the back via static electricity... why take the chance?)


Tension knob (ACK!)
Okay, and back to my suggestions. The tension setting. It took me a long time to figure out the tension setting on the Janome 1600P. The tension adjustor is a little knob. You can see it in the picture above. It sticks out. And it rolls forwards or backwards when you reach out to push the little button that changes your needle from needle up (or down) to needle down (or up), IF you run your forearm along it. ACK! I think you can see, in this photo that there is a little black mark (made with a Sharpie, as it happens) on the housing that is attached to the machine, and a smaller (slightly less visible one) on the actual tension knob itself. THIS is so, when I turn the knob with my arm by accident (sigh!) it is fairly easy to reset.

Changing the bobbin: The bobbin is on the front end of the machine, so you need to be able to move the machine to one end or the other of your quilt to get at the bobbin case. EVERY single time you change the bobbin, dust the inside of your bobbin case out. I have a couple of paintbrushes - one small one and one bigger one, to be a big help with this. Once in awhile, I turn the hand crank by hand, and watch for any build up of fluff in the hook part of the bobbin case - and I use the brush to remove as much as I can. Once in while I take the feed dog cover off and dust everything very carefully. When you put your bobbin back in the machine make sure it clicks - if it doesn't everything will make a BAD noise.

By the way, if your machine makes any BAD noises - don't keep going - stop and figure it out!! I broke a free motion foot into two pieces. The bad noise was caused (as it happens) (who knew) by a little bar that SHOULD have been OVER the screw that tightens up the needle - not underneath it. It made that BAD noise a long time before it broke!

When you are working around your needle, changing needles, feet or covering your feed dogs (or uncovering them) or changing your bobbin, be VERY careful around your sewing machine needle. I have a friend who put the needle through her index finder. Right through the nail and out the other side. I performed first aid, but I would say, from her point of view, that it was even more unpleasant to experience than it was to treat.

There are two other settings on the machine that I did not find out until after I had had it about three years, and I can't remember what they are supposed to be. One is that little knob on the top, over the sewing machine... Just a second, I'll go downstairs and look at it. BRB

Oh yes.
Pressor Foot tension
See that knob at the top of the machine? And see the little gauge below it, fairly near the tension knob (see how far that thing sticks out! ARGH!) Anyway, that little gauge should be set at 0 when you are free motion quilting - that knob controls the pressure of the pressor foot on the plate of the machine - and you don't want any pressure there when you are FMQ. (My machine came with a walking foot - which is basically unuseable with the machine on the frame... you would need it set at a different setting if you were using this on a table with a walking foot or a quarter inch foot - which I don't have for it anyway.)

While I am at it, this photo also shows a couple of spots where the thread can get hung up. One of them is described as the three hole thread guide in the troubleshooting tips above. When you thread this machine the thread goes in the first hold, over the top of that guide and back in through the third hole. Sometimes it gets wrapped around the bottom of that three hole guide.

The other place that I get the thread caught is on that little shepherd's hook by the tension knob. This is something I do when I'm trying to thread the needle. I must have threaded that needle a hundred times without hooking the thread on that - and then the last 5 times I've threaded it, I get it caught there - so I have started looking at it before I start off.
Stitch Length (and thread cutter)
The other thing you will probably want to adjust is the stitch length. That knob on the back of the machine does it. (There's the cutter button, btw! Just in case you wondered what it was.) (It cuts your thread. But it cuts the bobbin thread so that you have to open the bobbin area, take out the bobbin and pull the thread out a bit, put the bobbin case back in to the machine and lower and raise the needle to pull it up... I don't use it very often.)

A package of needles
Needles. I know that the machine says to use specific needles and I did when I first started. Exactly the needles that it told me to use. Now, I seem to be quilting faster, denser and wilder than ever, and those needles don't work for me. I went to my local sewing machine store and the gent there sold me this package of needles. I do not suggest that you buy them. I can only tell you that they have worked like a house on fire for me.

My quilt studio
So here you have it. The quilt studio with Big Martha and her frame. Am I having fun with my free motion quilting? You betcha!

Free Motion Quilting
Enjoy!