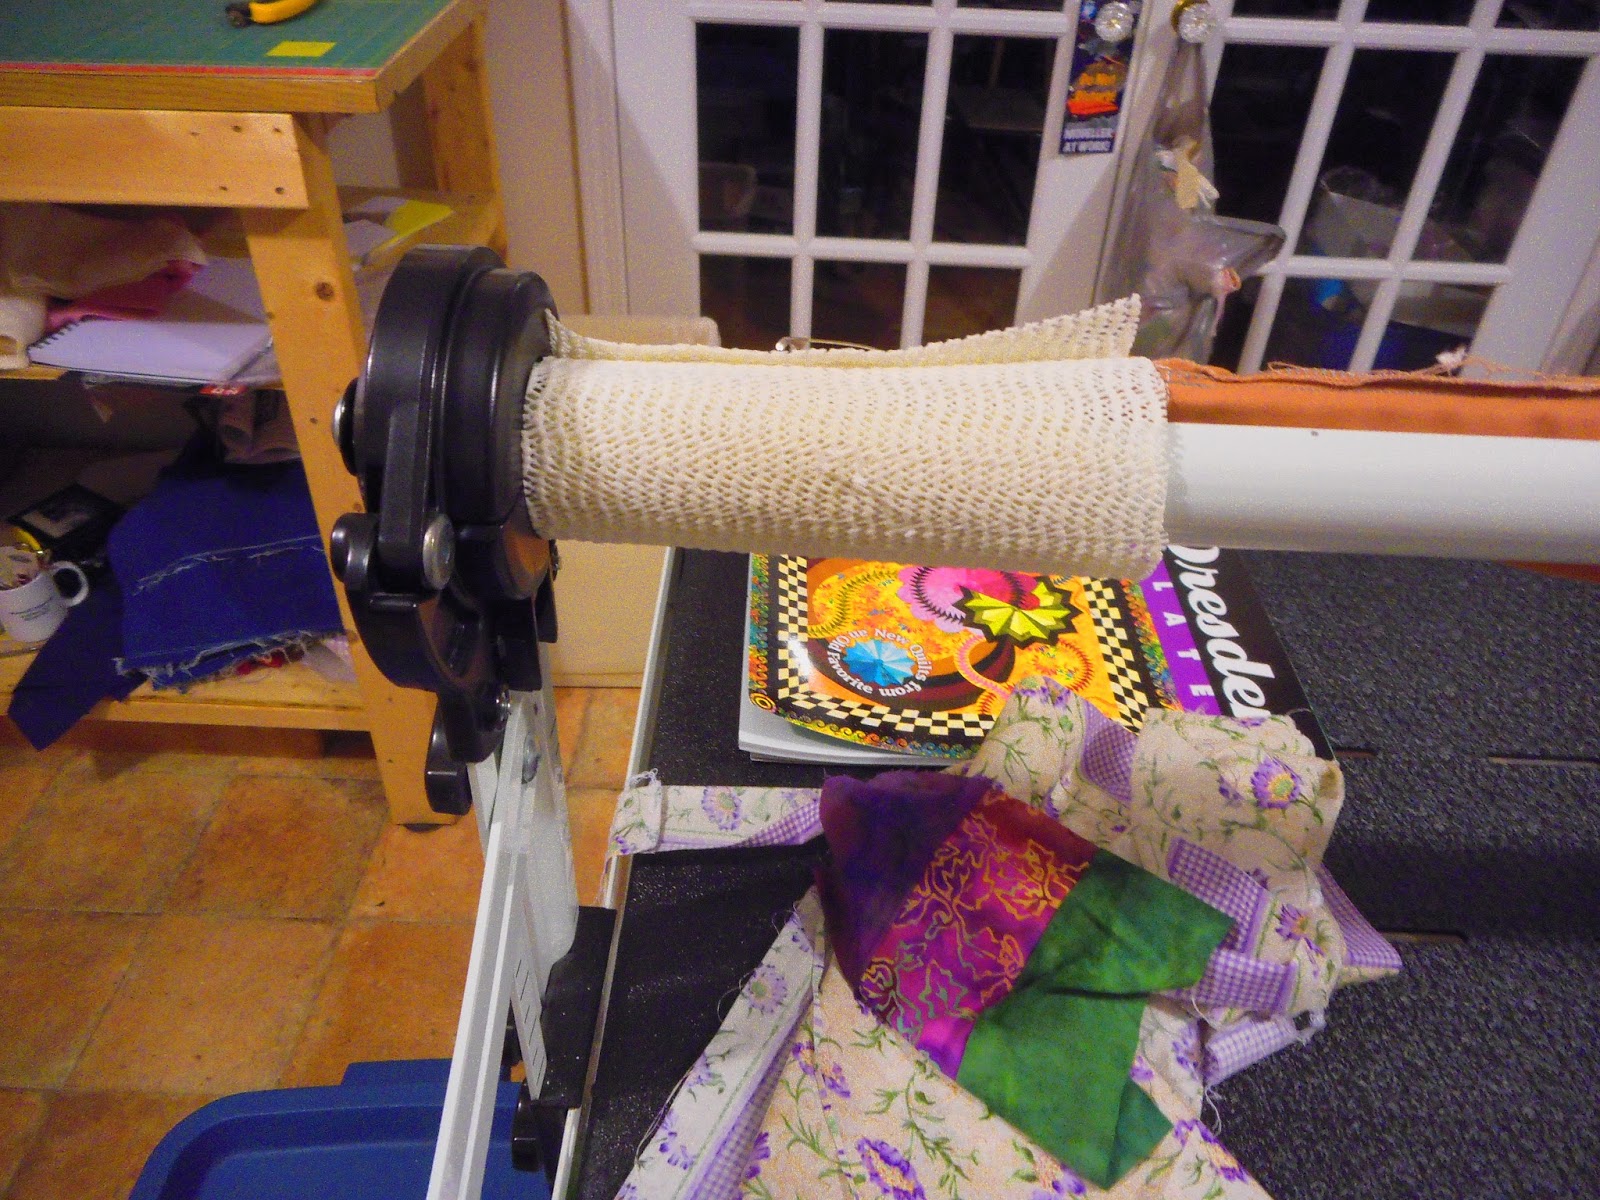
In October I will be running the program for my quilt guild and I thought I would pick the topic, Quilting Hacks. I defined a quilting hack as "using an item for quilting that was not designed to be used for quilting." I wanted a pile of cool ideas, and I put forth my request to the two quilting groups that I belong to on facebook. Within 12 hours I had had more than 400 responses between the two groups. Some of the responses were, "These are wonderful!" (I MAY have posted a few of those myself!) My favourite response of this sort was, "This is the FUNNEST thread ever!"
There were lots of duplicates. Quilters are smart, caring, sharing people - and somethings are just so obvious EVERYONE thinks of them. Some of the ideas were jaw dropping.
I spent three days organizing the ideas into some sort of useable list. And I will post it here.
Oh, and I did not attribute anything to anyone. Many of them were offered by several people. Some of them needed to be 'translated' or clarified and I had no way to ask for help. I did, at the beginning of my request let everyone know I was going to share them.
Some of them are my own hacks... I have shared these lists on the two facebook pages where they came from as well.
So this was fun. I will report on the Program itself next month! (Oh, and the results were 21 pages long! I suspect that I could have organized them better, and I may have another go at that before I present the program.)
Quilting
Hacks
Appliqué
Elmers Washable glue
can be used as pins. (Pressing your pieces briefly will dry the glue
quickly.)
I re-use dryer sheets.
After they come out of the dryer I will press them lightly. Then
place them over any shape or design I want to create an applique
shape for. Such as a heart. I then place the dryer sheet with the
traced design onto the right side of a piece of fabric and I sew
around the entire shape with a very short stitch. Then I cut out the
shape leaving a little 1/8" inch allowance. then with a small
slit in the used dryer sheet you can turn the shape inside out. The
dryer sheet adds virtually no bulk. It ensures a nice smooth edge
for you to either machine or hand applique. It is really good for
unusual shapes or ones with complex edges such as a ruffled flower.
I make 1/4" bias
strips for stems in applique and wrap them around wine corks..easy to
get a pin in to hold the strip to the cork.
Glue stick to tack
down appliqué pieces
Freezer paper ironed
to the back of fabric for appliques...peels off easily and works
great.
Awl (Stiletto)
Dentist tools can be
used as a tailor's awl. Dental pick from the dollar store to hold
down fabric while sewing.
Orange Sticks (a
manicure tool) can be used to hold seams still while sewing
You can sharpen a chop
stick in a pencil sharpener if you need a sharper awl, rather than a
blunt one
Instead of buying a
stiletto, I use a nut pick to hold ends or corners down
Basting
Skewers taped to the
table mark the centre for hand basting (you can feel them through the
quilt layers)
Large alligator clips
will hold everything together for basting.
Use woodworkers clamps
to hold quilt backing to table for basting quilt layers
Use a grapefruit spoon
to help close my quilting pins when I'm basting my quilt sandwich
Washers (covered) can
be used as weights to hold quilt taut while pin basting.
A "shooter"
marble (the bigger marbles) can be used under the layers of a quilt
when hand basting. It holds the quilt up just enough to baste
comfortably.
I use the plastic or
metal slide on clips; the ones that stop your picnic table cloth from
blowing away. I use them to hold tight the bottom fabric on a table
while I am layering it then add batting over clipped backing and lie
quilt top on. When you start pinning or basting nothing will shift.
Binding
Hair clips from the
dollar store can be used instead of expensive clips from the fabric
shop.
Black alligator clamps
can be used for holding your binding folded.
To organize your
binding, roll it onto an empty toilet paper roll and thread the roll
on a ribbon. Wear the ribbon around your neck – it will keep the
binding from twisting AND keep it up off the floor.
Old aluminum foil
cardboard tubes can be used to hold binding fabric
An empty CD holder can
be used to wrap binding around. Close one end of binding inside and
then wrap around the holder.
Altoids case can be
used to hold hair clips for binding. Hair clips are best price at
Dollar Store.
I sew binding on the
front of the quilt and hand sew the back. When I get to the corner I
use a pair of hemostats to pinch the corner just so and hold it
there while I sew around it. (Hemostats
are clamps that look
almost like scissors except they have flat tongs instead of blades
and they clamp shut.)
I use the pants
hangers to clip my binding on till I am ready to bind it. I put the
binding in a gallon storage bag with the name of the quilt on it and
leave it open a little so it gets air, then hang on a rod in my
closet
Put a big safety pin
(I call them a diaper pin) on the edge of your ironing surface and
pull my binding (folded) through it while I press it folded.
When I fold and press
my binding, I take an empty cereal box, flatten it and stick the
beginning of the binding in the center of the box. I then roll the
binding around the box. Then put a pin to secure it to the roll.
This keeps the binding flat and ready to go!
When I'm at JC Penney
I look on the floor in the Men's dress shirt dept. There are some
cool clip things that fall off the shirts. Those hold binding on a
quilt too while you sew.
Wrap binding around an
empty thread spool. Hold with a piece of dowel rod and a rubber band.
Doesn't unravel unless you remove the rubber band.
I put my binding in a
plastic grocery bag and put it over my right arm while machine
attaching binding to the quilt. Keeps the weight of hanging binding
from stretching.
I roll my binding
around a pencil, then put a eraser on the end as a cap.
Bobbins
Clear plastic tubing
cut into 1/2 inch pieces (or so) and then slit up the side. Holds the
thread on the bobbin
Sit your bobbin on top
of the original spool of thread – pop a golf tee through the bobbin
into the spool, and they will stay together.
Pipe cleaners can hold
bobbins onto the spools.
Foam pedicure toe
separators make great holders for bobbin storage.
Small elastic pony
tail holders over bobbins keeps thread from unraveling.
Store bobbins in an
ice cube tray (the ones for long skinny ice cubes)
Ring re-enforcers
(notebook paper holes) to label bobbins.
A large pill daily box
for bobbins for white, black, grey and monofilament threads. I keep
about 10 of each per colour wound and the clear box makes them
easier to find!
The little clips that
come on inhalers are just right to keep bobbin threads under control.
Books and Magazines
and patterns
Clips that were made
to keep fabric on a bolt work well to keep one's place in a quilt
book when you're reading the directions for cutting.
Use a small photo
album to hold those small card type patterns.
I hang my pattern
books for all my different crafts in a filing cabinet. I used the
tops of the hanging file folders, one to a book, unless it was a
large hardcover, suspending the book over it. I hang them so I can
read the title when I pull the drawers open. For leaflets and small
patterns, I keep the file folders intact. I got this from my
sister-in-law.
I took several of my
quilt books I use a lot to Staples (business supply store) and had
them spiral bound; now they lay flat and I find them easier to use
I use the cheap
plastic picture frame to keep the pattern I am working on standing up
in front of me (a copy so I can mark it). If it is a long pattern
with many steps, I use post it notes to mark where I am.
Mark your place on the
glass of the pic frame with a dry erase marker. I use this technique
for other needle work crafts that I do, ie. crochet, knitting, cross
stitch, etc.
A cookbook holder
works to keep your pattern hands free and able to see
I put pattern sheets
in sheet protector sleeves and mark on them with dry erase markers
Colours
I have used the color
cards from paint stores as a palette for a quilt. If you pick out a
card with your color choice, then take it to the fabric store and
match a fabric with each color on the card you will have a perfect
blend of colors that match for your quilt.
Cutting Mats
Nylon sink scrubby
cleans cutting mat
I use a vegetable
brush to clean my cutting mat.
A washable lint roller
will pick up threads from my ironing board and cutting mat.
I use a white plastic
eraser to clean my cutting mat.
A wallpaper brush
makes a good cutting mat sweeper, to get all the trimmings swept into
the trash.
A sandpaper block for
cleaning rotary mat (Be gentle, you don't want to damage your mat!)
Art gum eraser cleans
my cutting mat beautifully, over and over!
Cutting Tables
Bed raisers can lift
your cutting table up to a reasonable height.
PVC piping can be cut
to lift a table to the appropriate height.
My husband and I
acquired an old sturdy table, second hand, awhile ago. We took the
top off of the metal legs, and he built a 2x4 frame for the table
top. We added two sets of shelves on the underpart of the table, and
now I have a perfect cutting table for my quilt studio. Whether you
are tall,short or in between, there is nothing better than a cutting
table that is the exactly correct height – and storage for 3
rubbermaid totes underneath allows me to keep flannel, bits of
batting, and useable scraps of fabric organized!
I found an old-timey
8-pound iron in the shed when I moved in. I use it as a weight to
keep a quilt on the table, and I also brought in a few rocks from
the garden, cleaned them up real well and use them as fabric weights
too!
I bought a 3 drawer
dresser from Ikea. Took the cutting table from JoAnn's apart and had
one large section attached to the top of the dresser. Hinged the
other large section down the back. Put the entire thing on lockable
caster wheels. Now I have lots of great storage for stablizers, etc
and no wasted space with the table legs. If I need a larger cutting
space I just roll it to the center of the room and prop up the
hinged back section. I just did the same thing with my ironing
board. Now I have lots of space to collect more "stuff".
Design
Wall/Designing
A flannel backed
tablecloth will make a great design wall
An old flannel sheet
will make a great design wall
I like using a kid's
toy called a Bug/Insect lens. When you look through it you can see
multiples of a single quilt block to see what the top might look
like put together.
I also like using a
door peephole. Especially for those who do not have a large work
space. You can look through it backwards and see how the top or
overall design will look from a distance. It helps me see areas
where the design is not balanced.
Look through
binoculars backwards to see how a quilt top will look from a
distance.
Metal curtain rod to
make a design wall
Fabric and Project
Storage and Organization
Just got a pack of
comic book board for fabric storage.
Use multi level pant
holders to hang larger sizes of fabric
Use antique tabletop
clothes dryer to hold the strips from a jelly roll.
I have a folding
drying rack, which I use when I am making log cabin quilts – or any
quilt that uses lots of strips of fabric. I hang the fabric over the
bars and I can easily see what I want when I am ready to use it.
(This is not how I store fabric, but how I organize a project.)
The two gallon ziplock
bags hold my future quilt projects when I purchase my fabrics prior
to starting them.
Galvanized bucket to
hold current project, the handle makes it easy to transport
Pants hangers to hang
blocks up.
Old filing cabinets
with the metal frames for files make great hangers for fabric.
A small curio cabinet
for storing smaller quilts.
Larger cardboard tubes
- press fabrics and then roll round the tube to save creasing again
by folding.
Canvas shoe rack that
velcros over a closet rod to hold fat quarters.
Pizza boxes (unused)
to store your quilt squares as you finish them. Stores them great
after being pressed. You can also use them to store your cut pieces
to take to class or just to keep them all together until you sew
them together.
I use a wall CD/DVD
holder (made of wire) for my fat quarters
Clear plastic binder
pouches to keep fabric pieces clean and organized. You can see what's
in there without opening. And label it so you know how much you have
or what its for.
Use clear page
protectors in a binder to keep projects organized. Keep the block
with the page of directions until you are ready to put the quilt
together.
I use a clear zip-up
envelope (like sheets come in) to put a project and pattern in.
The pool noodles make
great places to roll your quilts onto to keep out wrinkles after the
project is complete.
I use a pool noodle
(foam tube) to store quilt tops to avoid folds while waiting to be
quilted
Old skirt hangers make
great places to hang table runners.
The clear plastic
boxes in which lettuce is sold make the perfect project boxes. When
they get beat up, I just toss them. Great to sort charm squares and
those small projects one likes to take to the dentist's waiting
room.
Chinese food takeout
containers - the ones that are black on the bottom and clear on the
top - are great for storing small projects and make them easy to
see.
Clear plastic trays
from Wal-mart that are 2 1/2 inch wide – great for strips
Surgical instrument
trays are great for sorting your projects
Finger Pressing
In a package of dental
tools from the dollar store, there was a tongue scraper - handy for
finger pressing.
Pie wedge utensil for
finger pressing.
Used key cards from
hotels for finger pressing
Foundation Piecing
I use dryer sheets for
string blocks
Freezer Paper
I use a Glad “Press
n Seal” empty box to store and tear my stabilizer or my adhesive
paper. No more cutting with scissors and always a straight cut.
Gloves
Banker's fingers can
be used instead of gloves
Gardening gloves work
as free motion gloves
Little kitchen sponges
will work as non-slip surfaces for free motion quilting
Two pieces of non-slip
shelf liner will work as non-slip surfaces for free motion quilting
Cheap foam flip flops
from Joann's to help grip your fabric while machine quilting on your
domestic machine.
Rubber kitchen gloves
are perfect for guiding your quilt during free motion quilting.
I purchased work
gloves from the hardware store. They are knitted but the fingers and
palms have been dipped into a non-slip rubber – they work great
for free motion quilting.
Finger cots from the
bandaid section worked the best for me! Lightweight but stick well!
Hand Work
When I hand quilt I
put a spool of thread in a baby food jar, punch a hole in the lid and
then pull the thread up through the hole.
I use an eye bolt with
a washer and nut. I slip a spool of thread on it and use a bit of
cording to hang it around my neck when doing a lot of hand sewing
Use extra long chain
to make necklace to put scissors on when hand quilting
Scotch tape. I use it
to keep my embroidery thread from unraveling.
Pliers, if you're
doing hand work. Sometimes you need a little help pulling the needle
through
Forceps for pulling
that needle through several thicknesses of fabric when hand quilting.
The rubber strip they
use to take blood to pull needles through multi layers of fabric.
Ironing Board
Use scrap strips sewn
onto an old ironing board cover and then just run a new piece of
elastic around the edge rather than replacing the cover.
Light Box
Cheap light box -
place white Christmas lights in a translucent plastic container.
Long Arm Quilting
Hacks
When I'm quilting
something on my longarm and the back isn't big enough to prevent me
from hitting my side clamps, I put metal hotdog-roasting sticks
around the poles to prop up the elastic and hold the clamps up so my
machine can get under. It's kind of comical, but works great! The
ones I have are shaped to fit two hotdogs, and the curve happens to
fit almost perfectly around the roller.
Metal curtain rod to
place on the long arm to keep backing fabric from drooping.
Don't know what they
are called but there are special metal bowls with magnetic bottoms
that make wonderful pin and needle holders. They are found at
hardware stores. I have a friend w/ a long arm who keeps one on the
metal rails of the machine. The magnetic bottom keeps the bowl in
place and she put her scissors, seam ripper and other tools in it
where they are handy. (Be careful with magnets and computers!)
Dental floss with a
small loop in it used for threading the long arm (comes in packages).
Marking the quilt
Crayola washable
markers can be used to mark your quilt for quilting. When done
quilting just throw it in the wash and they disappear. (I'd test
this on a piece of my fabric first!)
Use Painter's tape
(masking tape) for marking diagonal lines to quilt.
Tupperware lid can be
used to mark a curve
Dinner plate to make
the curved corners on a baby quilt or on fleece blankets
Use “Press-n-seal”
to draw on a simple quilt pattern and then place on top and sew right
over it. - not recommended when having lots of crossover seams too
hard to pick out the PNS.
The 6' metal ruler
from Lowe's for marking your quilt top
I use a few old
cardboard oven pizza rounds to mark circles or half circles for
quilting my tops
I use cookie cutters
for marking designs for hand quilting. Dip the edge in flour or
cinnamon depending on the fabric color for contrast - press firmly
onto the space I want the motif to be then hand quilt the design.
The flour will brush off when done.
Use colored chalk to
mark your quilts.
I have a stack of 4x6
notecards by my machine....I use them to mark diagonal lines and for
scratch notes.
I use a piece of
plexiglass bought at Home Depot to trace the quilting pattern with an
erasable marker I am considering for use on a on a quilt. I lay it
over the pieced top to see if I like it or if it needs adjustments.
When I'm done with it, I just wipe the marker off so I can use it
again later.
I use a small flat
piece of wood with sandpaper glued to it to - keeps material steady
while you trace a pattern
I spray glued a piece
of sandpaper to a plastic clipboard for fabric marking and template
tracing works well for applique and marking HST's. (This is also
helpful for stabilizing a quilt label, if you are writing or
printing on it by hand.)
Needles
One large daily
medicine dispenser can hold your sewing needles, or in a ring binder
plastic baseball card holder can hold needles as well.
Big Pill Box to store
packages of needles, I put labels on each lid for the needle type in
that spot. I put sticky backed felt on the inside of the lid that I
stick a used needle in that is still good, but not ready for the
trash.
Photography
Use Binder clips along
the top edge. To take a photo flip the pincher part up and hang that
on needles or tacks.
Paper Piecing
I use a professional
finger nail cleaner to pick out small bits of paper in the tighter
spots of paper pieced projects. The flat angled edge works great
For the paper for
paper piecing, buy the 20 lb (this is the quality of the paper, not
the weight of the box!) photocopy/printing paper. It will tear much
more easily than the 25 lb paper and is much cheaper than the 'real'
paper. Not only that, it will print in your printer with no problem.
Piecing
Marker tabs to mark
pieces
Post It notes to mark
pieces
Alligator clips to
hold pieces together in piles when transporting
Clothes pins with
numbers printed on them with a sharpie – to keep track of the order
of the blocks.
I use alphabet beads
on safety pins to mark my rows. A bag can be bought at any craft
store and usually with a coupon very inexpensive. I made several
sets out of just one bag.
Pin Cushions
Mechanic's have a
magnetic dish for screws and bolts and nuts; this works as a
brilliant pin cushion – just be careful around your computerized
sewing machines.
Get a few china
saucers at the thrift store, glue a few magnets on the bottom and you
have a great pretty place to put your pins right next to your sewing
machine.
There is also a
mechanic's magnetic dish with a wrist strap – handy for a
hands-free pin cushion
Pins and needles
Foam ear plugs will
hold pins in place. (And keep you from stabbing yourself with them as
you transport your work.)
For those expensive
Pinmoors, I went to the hardware store and bought a package of round
insulation and cut it into 1/2" chunks. Got about 300 of them
for less than 5 bucks!
I use a Mr. Clean
Magic Eraser as a pin cushion.
A dry Mr. Clean Magic
Eraser to clean & / or polish pins. New pins have a coating from
the factory & the sponge will remove it. Just use it as a
pincushion for the first time or two.
Bottle lids can be
used to make pin cushions.
I bought a long
handled magnet in hardware dept. (Like roofers using for picking up
nails) use it to find all the straight pins that always fall on
floor while I'm sewing. I'm usually barefoot in my sewing room and
this helps me not getting stuck.
Roll up used SOS pads
and cover...make great needle holder/cleaners.
Pressing
1 part cheap vodka and
3 parts water as a spray when ironing takes wrinkles out of material
like a charm and gives it a bit of stiffness kind of like Best Press
only cheaper. (Vodka is not cheap in Canada, I suspect this one will
not work for me.)
Glass Vinegar bottle
will take a spray top from a plastic bottle, and if you touch it with
the iron the glass bottle will not melt.
Parchment paper can be
used to shield your iron from the dangers of sticky goo when using
fusible webbing.
One woman uses her
husband's white golf shirts as pressing cloths.
A metal icing spatula
holds the seams flat when pressing. It has a bent shank, and won't
melt.
At the sewing machine,
in lieu of finger pressing, use a tiny wall paper roller to press
seams open.
Clean your iron with
wax paper crumbled up in a ball and GooBGone if you get adhesive on
it.
Used dryer sheets will
help clean stuff off your iron--use on hot iron
Pour a layer of salt
into a 9 x 13 pan and iron directly on the salt to remove goo from
your iron.
I use a really ugly
bracelet that I keep attached to my iron. When I turn it on I put the
bracelet on. Return to iron if off. Soooo....if it is on me the iron
is on! Took a plastic slinky and cut down the side, passed this out
to guild members to use.
I have a big cup hook
on the underside of the shelf over my ironing board. When I unplug my
iron, I hang the cord on the hook. When I stand by the sewing room
door, I can see whether I have left the iron plugged in or not.
I take a cork round to
classroom set the hot iron on. Found at Wal-mart in kitchen area as a
trivet or in the garden dept to set pots on. Comes in a variety of
sizes.
I borrow cans of tuna
from the pantry & use them as weights when I need to pin long
strips like borders; prevents material from slipping off the ironing
board.
When making a pinwheel
block, for instance, where the center is bulky, iron it well then put
a bacon press on top. Come back later and your seams are flat
I found an old-timey
8-pound iron in the shed when I moved in. Perfect for anything
needing a pressing without heat!
TV tray: Cover the top
with thin batting (100% cotton) and material to make a small ironing
board for blocks
Make yourself a larger
ironing board surface by buying a piece of plywood or MDF board at
the lumberyard. Have them cut it so it measures 2 feet wide by what
ever length you want it. Then you lay your ironing board on top of
the plywood board and draw around it. (This is so that you can put
your new bigger ironing board on top of your old ironing board... the
old board will be the new rectangular board's feet!) Then you need
some pieces of 2X2 which you will place around the drawing you did
of the ironing table. Screw them down into the plywood making sure
the screw doesn't come through the top of the plywood. Now take the
plywood and cover it with a couple layers of batting (100% cotton!)
and heat resistant fabric on top. The stuff I used is silver and is
used in oven gloves and such. Once you have that done you will have a
large area to iron your quilt tops on.
I have an ironing
board, as described above. And my husband made a lovely stand for it
out of 2x4s that is the perfect height for me. AND I added some
shelves on the bottom where I keep Works in Progress in Rubbermaid
containers.
Quilt Frame
Go to the parts store
and buy a hand held LED mechanics light they are great for checking
under quilts when they are on the frame.
I use a apron when I'm
long arm quilting to keep scissors, tweezers etc in reach.
Rotary Cutters
Use foil to sharpen
your rotary blades. Just stack a few layers then cut with your cutter
works great
I buy carpet blades to
use in the rotary cutter. they are 2 to a pack for $1.99USD and yes
they are the same size. They get them from Harbor Freight in the US.
(the Item # is 97642 or 95378 replacement carpet cutter blades)
I bought the heavy
duty hardware gloves to use my olfa cutter to protect my hands. They
are rubberized so its hard to manipulate but safer for your hands
while cutting.
Rulers
Belt Hangers – to
store rulers
Handles – Bathroom
section of the hardware store has those handles with suction cups
that can be used to make rulers easier to handle.
Put Nexcare flexible
tape on the back of rulers to prevent slippage.
Rubber shelf liner
stuck on the back of the rulers will help with slipping
Masking tape can be
stuck on the front of the ruler so you don't have to keep looking for
the same measurement when cutting multiple strips the same width
Plexiglass cut to size
at the hardware store makes for great squaring-up rulers, too
I use plain metal
shower curtains to put through the holes in my rulers to hang up on
my slat board hooks.
A piece of self stick
tile makes a nice rotary friendly template
A T-Square is 2 1/2
inches; great for cutting strips
I use an t-square that
sheet rock carpenters use to square up quilts and cut batting. It is
48 " long and can make one cut on rolled batting
I use a empty bubble
gum container to hold my 120" tape measure. Remove label with
GooBGone
Ikea utensil rod and
hooks to hang rulers
I use a plastic office
mail divider for my small rulers to keep them handy and organized.
The big rulers have a
strip of selvage tied through the hole in the end and I hang them
from a clothes hook on the wall.
Kitchen hanging pot
rack for rulers and templates
I purchased an 1/8
hole punch and a stick on sanding disc, punched out a whole bunch of
pieces, keep the whole punch and pieces in a zip bag, and use the
little pieces on the back of my rulers to keep them from slipping.
(remove the paper backing on the pieces with a stick pin) gives you
a life times worth.
I use according folder
for all of my small rulers and other quilting items. Very inexpensive
and you can mark what is in file
Plate rack to hold my
rulers.
I keep my rulers in a
napkin holder
Use a letter sorter
for small rulers at your cutting station
I use a metal
yardstick rather than a plastic ruler, and imagine it will be good
for another 30 years.
I have a country look
in my house so I use an old ladder hanging horizontal from the
ceiling for my rulers & templates. It hangs above my cutting
table! Bronzed mug hooks are what I used for the actual hangers!
I use Hercules hooks
to hang my rulers on.
The racks that hold
plates on the wall can also hold rulers or cutting mats
I bought some really
large notebook rings, put my rulers in categories on them, then hang
each ring on the end of my metal shelves.
Scissors
If your scissors don't
cut well, layer a few sheets of wax paper and cut thru them, makes
the blades glide smoothly.
I use one of the cords
that go around your neck you see any people wear for name badges and
hang my small scissors on them because I keep losing them. Always at
hand when I need to snip a thread.
A magnetic kitchen
knife rack for scissors
I fastened a plastic
scissors holder (kind of V-shaped) to the side of my machine with a
sticky Velcro to keep a pair of scissors with the machine
I use the cardboard
rolls from small bin bags (they're stronger than toilet rolls) to
support my scissors to keep the points sharp.
Coffee cup 'tree'' to
hang scissors etc on
I have a row of cup
hooks to hang my scissors
I use a small magnet (from craft or home improvement stores) on my
Kangaroo (Stork) scissors and another one of the underside of my shirt to hold
my scissors handy. Just slide the blade of the scissors off the magnet.
One magnet stays on the inside and one on the outside! Always handy,
never under anything, never swinging around when you lean over. The
magnets are about the size of an aspirin and strong enough to hold a
pair of 7" scissors. Just remember to take them off as they don't come
out of the metal wash tubs easily and don't stay on your shirt in there.
I made business cards for 'get acquainted' gifts at guild meetings and
gave everyone a set of magnets for their scissors. Everyone remembered
me!
Scraps
A plastic coffee can
is great for putting small strips/pieces of material in for saving
for your stash
Antique crystal ice
buckets for scraps of fabric
Seam Ripper
Safety razor as a seam
ripper (BE CAREFUL!)
Small battery operated
clippers (moustache trimmers) as seam ripper. Takes only seconds for
long seams. (AGAIN, be careful!)
In beauty supply
stores they sell small plastic disposable razors,wrapped with wire
used to groom eyebrows. It's a terrific seam ripper. (Need I say, be
careful, again?)
Old blunt (ish) rotary
cutters make great quick unpicks especially if you have shortened the
stitching like you do in foundation piecing. (AGAIN, be careful!!)
When ripping out a
seam, line the back with masking tape or blue painters tape; on the
other side, nip every few stitches. When you are done nipping, pull
the tape and it will rip it all out very easily and the little
string leftovers will stay on the tape!
I know none of you
would ever do this, but just in case you might know someone who has
to take their stitching out (frog stitching) an emery board from you
manicure supplies will pick all the little pieces of thread right
off your fabric
Serger
I use a mouse pad to
keep my serger from walking around. Keeps it quieter too
Sewing kits
When traveling and
stitching, like waiting in a doctor's office, I carry a small cream
cheese container for threads, etc
The container craft
pins come in from the store can hold a tiny sew on the go kit.
Needles in one of my antique needle cases.
An empty dental floss
container will hold a bobbin of thread for traveling, and by
threading your thread through, you will have a cutter. (And you
don't have to worry about scissors on airplanes)
Sewing Machine
Extension
I put thread boxes
around my machine to make a great big quilting table.
Sewing Machine Hacks
I use cheap alcohol
wipe squares (one's doctors use before your shot) to clean off any
residues from basting spray or tape (on the sewing machine needle,
or scissors)
Use several layers of
masking tape to make a sewing gauge on bed of your sewing machine
A stack of “post
its” to use as a guide to maintain the correct seam allowance
Two door stop wedges
underneath the back of the sewing machine to tip it forward and make
things easier to see.
I use the circular
pads you put under chair feet to elevate my sewing machine in the
back. I'm short so this really helps me to see my fabric that I'm
sewing.
Irish Spring soap to
reduce smell of older sewing machine in case
Rubber shelf liners to
keep the pedal from slipping
I use a mouse pad with
an elevated pad for your wrist. I place it on the floor under my
sewing machine and put my foot pedal on it. Even when at a class it
keeps your pedal from sliding all over the place and the raised
section serves as a stop for the pedal so it does not slide off the
mouse pad.
Sand paper attached to
the bottom of your pedal keeps it from sliding.
I put velcro on the
bottom of my sewing machine foot to keep it from sliding. (Works on
rug)
Use a NEW toilet brush
to sweep up around your sewing machine – this will pick up all your
bits of threads and snips of fabric – make sure, however, that you
mark your toilet brush so it doesn't get used for its original
purpose!
If you use a Swiffer,
you might try what I do, I make my new pads by using odd pieces of
batting that normally would be thrown out. Works great on floors
(picks up all those pieces of thread) or any surface that you need
to dust.
For a trash bag at the
sewing machine, when I am in a class or long term situation I tape,
with masking tape, a brown paper bag to the table. Could use an old
bag you get your prescriptions from the drug store in too.
I use the square
kleenex boxes for trash next to my sewing machine.
I use empty plastic
yogurt container to clip my strings and scraps into so they stay off
the floor and out of my kitties tummies.
Attach a soap dish
with suction cups to the side of my machine to hold small tools. ($
store)
Tape a pen cap to the
side of your sewing machine to hold your seam ripper. If you have a
larger Seam ripper, an old medicine bottle works.
Use a long piece of
selvage edge that you have trimmed off your fabric to tie a pair a
snips to your sewing machine's cord. (Then you can find your
scissors when you need to clip those little triangles of fabric)
Use a rotating desk
organizer , from an office supply store, beside your machine for all
your tools
A magnet on a stick
from the automotive store is good for not having to bend over to pick
up pins on the floor. They are usually telescoping too.
A long handle grabber
to pick things up I drop behind the machine or other difficult to get
to places is useful.
Toilet paper rolls to
use with all your sewing machine cords; just fold cords and push
them through rolls. Keeps everything neat and tidy
I have self sticking
Velcro attached to the back of my machine to hold my threads when I'm
starting to sew. Always know where my threads are and they don't
bunch up as I start.
I pilfer coffee
stirring sticks a couple at a time and insert a little piece of
chenille. It is great for cleaning lint out of my machine.
Tiny little dental
brushes work great in cleaning the bobbin area of your machine
I keep Q-tips handy,
put a spot of oil on the end and use it to oil the bobbin area of the
machine each time I replace the bobbin. Keeps things running
smoothly and quietly.
I have a small soft
round paint brush that I use for cleaning lint from my sewing
machine. Works like a charm and can get into spots that the little
stiff brush that came with the machine can't reach.
Make up brushes work
well to clean out bobbin area
A small piece of
batting pinned to my shirt will store clipped threads
A cookie sheet for
storing and moving tools between cutting table and machine - makes it
easier to keep together and carry.
Letter opener to cut
apart chain piecing.
Not only can you use
your credit card for the obvious stash building purposes but you can
cut it up (once it is maxed out) and use double sided tape to tape
at the 1/4" mark on your sewing machine bed. It makes an easy
guide for your material to run along.
I use an old gift card
when doing mitered corners
Starbucks or Costa
wooden stirrers for coffee - sneak a few next time you're having a
drink - perfect 1/4" rule allowance
Sewing Machine Tools
I have a small tool
box I carry with me when I go to retreats "Mary Poppins sewing
bag" is what my quilt guild calls it...let me see what it has
in it...A paintbrush and crochet hook stored in a toothbrush holder
to clean your machine. Q-tips (stored in a travel soap box), round
facial pads and a bottle of alcohol (rubbing of course) to clean goo
off of needle. Small set of screw drivers, a regular and Phillips
CHUBBY screwdrivers, tweezers, chenille sticks for the hard to reach
fuzzies, small set of Chubbys socket/screw set (just in case you
need some extra torque to open a throat plate. Doorstops, as
mentioned above. Squeezy ball to exercise hands and wrist. Bottle of
sewing machine oil and disposable gloves. Retractable carpenters tape
measure for measuring quilt tops. ....Oh YES....and a small hammer,
have never used to for anything, but as a carpenters daughter I was
raised to never leave home w/o it!
I keep a pair of
tweezers in my sewing machine tray at all times.
I am a retired RN but
still have some tools of the trade. Hemostsat (or Kelly Clamp ) to do
surgery on my machine when the thread jams
Keep a toolbox in the
sewing room. Mark the tools with a shade of nail polish that will
guarantee the guys won't use them & don't take them from your
sewing area. There will always be a machine to clean, or something
to hang on the wall, or a stubborn needle that needs a little help.
I buy the floral sclew
driver, and use decorative duct tape on handles of my tools to keep
my husband from borrowing them and never seeing them again.....he
won't use the girly ones. Works great.
A dental mirror to see
things in place hard to see (I keep it with a small flashlight)
Sharps
I took one of my
children's small milk bottle/cartons, cut a hole in it, and I use it
for "sharps." Bent pins go in there, dull rotary blades,
sewing machine needles, etc.
I kept a hand cream
bottle with a screw on lid. And I keep all my dull 'sharps' in there.
I broke a rotary cutter blade, I have broken or dull sewing machine
needles, bent needles I used for binding and the occasional pin that
I have folded in half (usually with the sewing machine, by
accident!) When it is full, I wrap a piece of duct tape around it
and toss it in the garbage.
I use an old
prescription bottle for old needles. I just drill a tiny hole in the
lid, superglue the lid on, and then I just put them in the trash.
(Someone suggested that the small hole be dispensed with)
I dispose of used
needles in an empty Sew Easy glue tube.
I use a short glass
jar (mushrooms came in it) and put my used rotary blades in it for
disposal. Perfect size because it is only about 3" high, stores
out of the way and holds so many blades it's unreal.
The empty round
containers that ICE BREAKERS mints come in make great storage for
used rotary cutter blades until disposal
I keep the little
containers that lead for mechanical pencils comes in to dispose of
pins and needles, also. They are small enough to fit into my travel
sewing box.
Empty Altoid tins are
good to hold old, broken needles, pins, and dull rotary blades.
Vitamin jar to hold
old needles, pins.
I use an old Tic Tack
container to store my broken needles in (from the long arm).
I took an empty peanut
can, small one, and punched hole in lid for used needles and pins,
and of course any pins that I have used and bent
I drink coffee while I
quilt and we have a Keurig. The used "pods" are great for
throwing away used needles
Squaring-up
Tile laser for
squaring up quilts before adding the binding and also to square up
quilt backs.
Stencils and
templates
I buy colouring books
and use stencils for walls as ideas for applique projects.
X-ray film for
templates.
Plexiglass is awesome
for making templates
Kitchen trivets that
are oversized like tiles..makes a perfect square. U learn to use what
u have.
Cereal boxes to make
templates
Plates of various
sizes to make scalloped edges on your quilts.
Bowls and cups of all
sizes for drawing patterns
A spaghetti serving
measurer makes a great marking tool for circles of different sizes
Storage and
Organization (Tools)
I installed two Clear
View 12 bin stacking organizers on the wall behind my work table for
storage of the hundreds of tiny things that every sewer needs. With
the clear see through doors it is a cinch to find anything.
Use Crystal Lite
containers to hold markers and other odds and ends.
Cups to keep paint
pens in.
A wine rack will hold
rolls of stabilizers.
Cup hooks screwed into
the bottom edge of a window sill to hold ... well, whatever you want
to. Mine hold my small scissors ( tied onto a ribbon), my measuring
tape (also on a ribbon), my bag of machine needles, a "cheat
sheet" for quilt backing measurements, etc.
Spring loaded curtain
rod between bookcases holds a roll of batting
An acrylic make up
organizer with lots of different sized compartments, sits by the
sewing machine holding awl, tweezers, crochet hooks, brush, seam
ripper, little screwdriver, paint spatula, chopsticks.
Save those oversized
clear plastic containers cheese balls come in. They are fantastic for
stuffing the scraps and steps in for future scrap quilts; also, a
great place to find that fabric that is needed to patch a damaged
quilt if you forgot to stash it behind your label.
A metal, extended
length, ruler Maybe 48" stiff enough to aid in smoothing the
backing batting and top during assembly process. It is an extension
of your arm across a large table or floor. These can be found in the
hardware store
Silverware tray
organizes needles, marking tools, pens, pencils etc.
Clay pots for larger
tools or scraps of fabric
Using those plastic,
zipper bags that bed sheets come in for odds and ends for sewing.
Tool bag with multiple
compartments and/or toolboxes are far cheaper than any similar
carrying devices made for quilters.
Use mason jars for
buttons, pins, etc.
Baby food jars for
buttons
I have one of those
remote control things that's supposed to hang on the arm of your
couch/chair that I use to hold pens, rotary cutters, seam ripper
etc, hung on the arm of my sewing chair.
I use a Pampered
Chef's rotating utensil holder on my sewing table to hold cutters,
small rulers, pencils etc.
I use slat board and
hooks or pegboard and hooks to hang my spare rotary tools and
stencils, etc.
I use fishing tackle
boxes (the plastic ones) to sort beads and embroidery floss.
I use old Tide Pod
containers to hold buttons, ric-rac, and other small trims. I took
some black paint and repainted the labels so that it looked like a
chalkboard to label them!
Over the door shoe
holders, clear vinyl pockets, to hold all my rolls of interfacing and
stabilizers and other sewing tools. Clear pockets let me find things
easily!
I use empty paper
towel and toilet paper rolls to keep cords from getting tangled on my
iron, lamps and sewing machines when not in use.
Peg board and hooks to
organize supplies.
I use an assortment of
large plastic jars, the kind nuts and pretzels, etc, come in to store
small scraps, unused binding scraps, wound up strips. I sit them on
top of cabinets around my sewing room, they are attractive AND you
can see what is inside.
I save baby food and
formula container for pins, measuring tape. They can store a lot of
little things and extra binding too
Use a Pringles can
that you decorate. Great for storing your small items like seam
rippers
Empty toilet paper
rolls slit down the middle will hold wonder under, iron on fleece, or
interfacing You may also write needed directions on the tubes
Masonite from hardware
store is great for purse bottoms (my husband cuts it for me) and also
a large piece goes in the "X" under my ironing board to
store my cutting mat, and large rulers.
Thimbles
Bankers fingers
Love my veterinarian
wrap versus a thimble
Thread
Thread spools and
bobbins are kept on a peg board with a dowel through the holes to
hold them.
I store my spools of
thread on dishwasher racks on the wall
RX bottles to hold
spool of thread and matching bobbin.
Back scratchers are
great for retrieving things from under furniture. Bobbins &
spools love to roll to the least accessible places.
I took 2 long nails, a
2 x 2 x 4 piece of wood, nailed the nails up through the bottom of
the wood, and made a bobbin holder.
I created my own
Spool/cone holder from a twisted coat hanger wrapped around a coffee
cup, and I put the cone in the cup.
Use a mason/canning
jar to hold a spool of thread.... it never flies off the pin, or in
this case out of the jar
Thermal beverage glass
with straw will hold a cone of thread and thread goes through straw
hole. Your thread stays clean and this will replace a cone thread
holder.
I use a plastic coffee
can with a hole in the top to put my cone into for sewing. Just
haven't gotten around to buying a 'cone-holder'!
I use that black
support CD / DVD package (the kind that holds 25 or more blank
CD/DVDs), to support the sewing thread cone. Requested, only the
support in CD / DVD store.
When school supplies
are out I buy the school boxes to put my thread in. Assorted colors &
they stack really well and you don't get the thread hot or dusty in
the sewing room
I use an old cotton
reel (spool) up the inside of a thread cone so that it doesn't wobble
and cause tension problems.
I use cling wrap
around my thread reels (spools) to keep them from unraveling
Use dental floss when
making yo-yo's if quilting thread not available.
I use sticky dot to
stick on my thread that has been open but not in use
Press and Seal, small
pieces to hold thread end on spool.
Mesh tubes that hold
flower bouquets together will slide over your thread cones to keep
them from unwinding.
A straw in a weighted
take-out cup makes a free thread cone holder.
Use upside down
plastic cups to hold thread...especially useful with large spool
sizes and to keep dust off: punch a hole in top.
Small zip lock bags
(2" x 3") to put my spool of thread and bobbin to match in
together.
Rows of coat pegs will
hold large spools of serger threads or cones of thread
Transportation to
and from class/retreats
Paper plates, I cut
several blocks and keep track of them by placing the block pieces for
1 block on each plate. They stack and can go to quilt class and stay
together
I use a freezer bag.
You can buy big ones – they will actually hold a 12 1/2 by 12 1/2
inch block.
A plastic rolling tool
box for carting all you need to classes. Available at Canadian Tire
in Canada, and automotive supply places elsewhere.
I use my mailing
labels to mark all parts of my machine, iron etc. when taking a class
or going to retreat
When taking class and
need a few different colored bobbins, I put them in a small
prescription bottle and put in an long cosmetic bag with threads and
rotary cutter, etc.
Large suitcase full of
quilting items to take to retreats
But my favorite of all
is the Tupperware Salt and Pepper shakers which are kinda round but
pop open...I store pins in them for when I travel! lol
Laptop case for taking
projects on the road.
Trapunto
There is a dental tool
with a tip like a spade that works like nothing else for trapunto.
Turning things
Wooden chop sticks can
be used to push out corners when turning things (pillowcases, purse
straps, etc.)
those orange or yellow
tupperware orange peelers make great corner pokers that you use when
you turn the handles of tote pockets and handles.
Use bamboo skewers to
turn corners and to turn tubes for my applique quilts
Straws for turning
appliqued pieces.
I use my hubby's gun
cleaning rod to turn tubes
Wooden dowels with
safety pin duct taped on for turning tubes
Ideas for presenting
the program
Put all the 'odd'
items on a table to display as folks arrive and do it all at once.
The proper direction, after some examples, would be to present a
problem and ask what solution they might come up with, as in a messy
nest of yards and yards of bias strip, "How could we prevent
this from happening?” The summation or closure would be "what
other problems do you have when quilting and what solutions come to
mind now that we have opened the box?”
For your class I love
the idea of holding up an item and asking what else it could be used
for. If you don't choose very many and they are not expensive
perhaps you can put names of the participants in a bowl and choose
winners of the awesome new quilting tools...